How to Display HTML data from a Sheet
By Nihey Takizawa published on

Displaying HTML data from a server can bring some challenges, one of which is how do I update my content in a simple and easy way?
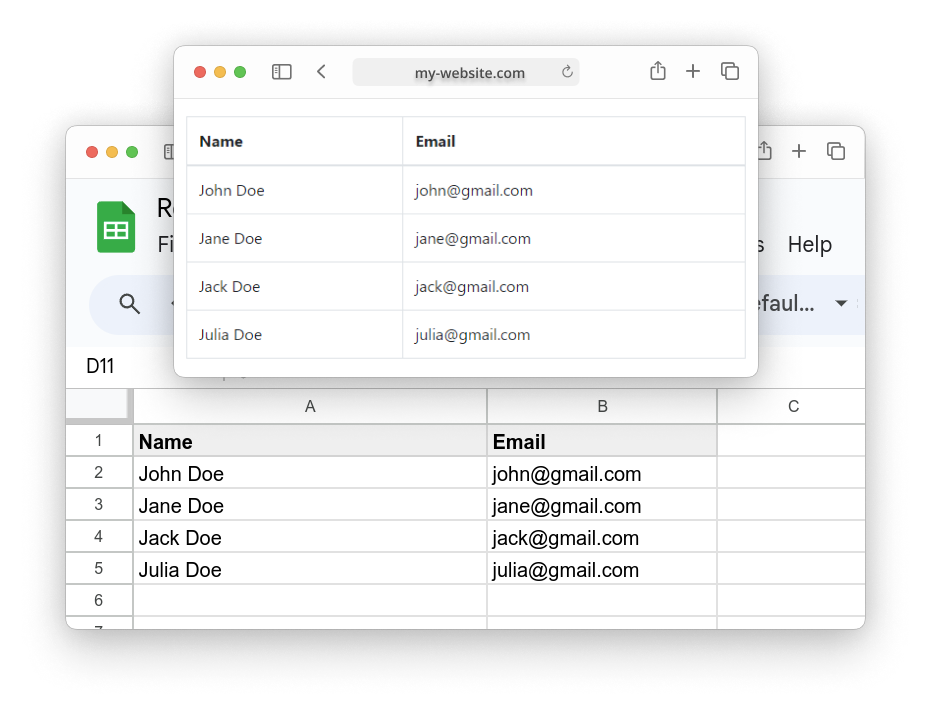
One easy way to handle this is to use a Sheet as a CMS, sending the data from your Sheet directly to a HTML page using a Table element.
In this tutorial we'll use send data directly from a Google Sheet to a HTML Table.
We'll use Sheet API HTML, a tool that lets you integrate Sheet API straight into HTML.
Step 1 - Generating your Sheet API URL
Make your sheet into an API, this API will be called when fetching your data to be displayed in the HTML Table, this way submissions will go straight into the sheet.
- Log in to Sheet API
- Click the Add Sheet button and insert your sheet to Sheet API
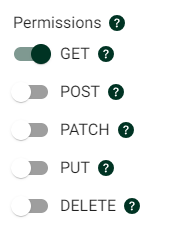
- As you'll only use POST requests, we recommend only enabling the POST request type

- Copy the link to your Sheet, you'll use it in the next step
Step 2 - Building your HTML Table
Now we'll build a table, we recommend using an AI Tool like ChatGPT.
We'll make one with the following prompt:
Make sure that you replace the style library, columns, and other instructions to your specific needs
1Make me a HTML Table using the <your style library> framework and the following columns:
2
3- Name
4- Email
5- <other fields you would like>
6
7<Other instruction you might have>
8
9The tbody tag should have the following HTML attributes:
10
11- data-sheet-api-url="<Your sheet API URL>"
12
13The tbody content must contain this pattern:
14
15<tr>
16  <td>{{ ColumnName }}</td>
17</tr>
18
19The column name is case sensitive.
20
21It must also load the script tag: <script src="https://unpkg.com/@sheet-api/html"></script>
22
If you followed this step with AI, you can go straight to the Next Step.
If you wish to go old school, ensure you have your HTML code set-up. For this first code, we'll use this already created HTML form:
1<div class="container">
2  <table class="table table-bordered">
3    <thead>
4      <tr>
5        <th>Name</th>
6        <th>Email</th>
7      </tr>
8    </thead>
9    <tbody
10      data-sheet-api-url="https://api.sheetapi.rest/api/v1/sheet/g5e09XKtRZ4OaydVCSSeK"
11    >
12      <tr>
13        <td>{{ Name }}</td>
14        <td>{{ Email }}</td>
15      </tr>
16    </tbody>
17  </table>
18</div>
19
Step 3 - Integrating the form with the Sheet
If you followed the AI Step, you'll have everything setup and can go to the demo at at end of the tutorial.
If you went old school, we'll now need to integrate the HTML Form with the sheet. To make this you'll need to:
- Add the attribute
to the parent where you want your data to be displayed. In the example we'll usedata-sheet-api-url="<your Sheet API URL here>"data-sheet-api-url="https://api.sheetapi.rest/api/v1/sheet/g5e09XKtRZ4OaydVCSSeK"- The fields you would like to replace must be enclosed in curly braces, with
the column name in between, for example:
, it will be replaced with the actual data from that column.{{ ColumnName }}
- The fields you would like to replace must be enclosed in curly braces, with
the column name in between, for example:
- Add the script
<script src="https://unpkg.com/@sheet-api/html"></script>
1<div class="container">
2  <table class="table table-bordered">
3    <thead>
4      <tr>
5        <th>Name</th>
6        <th>Email</th>
7      </tr>
8    </thead>
9    <tbody
10      data-sheet-api-url="https://api.sheetapi.rest/api/v1/sheet/g5e09XKtRZ4OaydVCSSeK"
11    >
12      <tr>
13        <td>{{ Name }}</td>
14        <td>{{ Email }}</td>
15      </tr>
16    </tbody>
17  </table>
18</div>
19<script src="https://unpkg.com/@sheet-api/html"></script>
20
A finished example of this form can be found below:
You can see the Google Sheet it was based on below, or at this link.